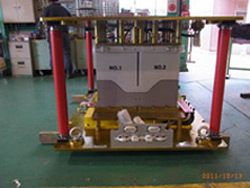
At FET Engineering, we provide premium quality vacuum forming tooling for the automotive industry. The tooling pictured here is used for in-mold grain lamination of a full automotive interior door panel. The base plate measures 2100 mm in length and 670 mm in width with an 850 mm stack height. The mold was created by wrapping the model onto the master mandrel which was then transferred to the plating mandrel in order to form the nickel shell. The electroformed nickel shell was then mounted into the frame which contained the water lines and thermocouples for precise temperature control during the vacuum forming process.
The tooling was fabricated to tolerances as tight as ±0.125 mm with a tolerance of +/- 0.05-0.1 microns required for the grain surface detail. A variety of testing and inspection methods were employed to verify all tooling met the specified standards. The grain detail, gap checks, and alignment were inspected by experienced quality personnel. CMM equipment and a FaroArm laser scanning system were used to perform dimensional inspections. Additional quality control measures included ultrasonic thickness testing and trim blade tuning. One set of front and rear doors, the glove box door, and the knee bolster tooling were fabricated as a part of this project, with a total turnaround time of 22 weeks. For additional details about this custom electroformed nickel tooling project, see the table below, or contact us directly.


